Installation and Setup on Linux
In this tutorial, we will install and set up the Actian Zen Server database on Linux
This page covers the topic listed at right.
Downloading and Installing Actian Zen Server
First, download the installer for Zen Server.
All downloads are available from the Actian Electronic Software Distribution page. Downloads require an Actian ID, so make sure to log in or register an Actian ID before starting the download.
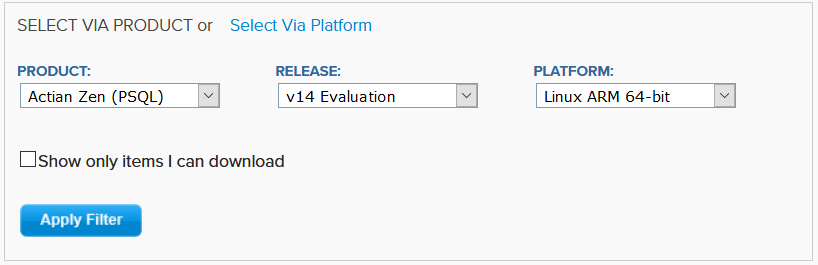
For this Getting Started guide, we recommend downloading the trial version of Actian Zen:
- Actian Zen
- V14 Evaluation
- Linux ARM 64-bit or Linux x86 64-bit, as appropriate for your platform
Download the file. Take note of the file name and where you have saved it. Let’s say that it was saved to your Downloads folder (~/Downloads).
Next, open a terminal. We need administrative privileges. To start an administrative session, enter the following and press Enter.
sudo -i bash -l
Now that we’re in an administrative session, let’s unpackage the Actian Zen files to the correct location. In the terminal, run the following two commands to unpack the files into /usr/local, replacing [filename] with the name of the file you downloaded.
cd /usr/local
tar -zxf ~/Downloads/ [filename].tar.gz
After the files are unpacked, there are a few scripts that must be run to complete the installation.
cd actianzen/etc
./preinstall.sh
./postinstall.sh
After the postinstall.sh script finishes, the installation is complete. Note that the installation creates a new user account on your system named zen-svc.
For more information see Installing Enterprise Server, Cloud Server, and Zen Client for Linux-based Systems